An
'extrude along normals' that works like it should
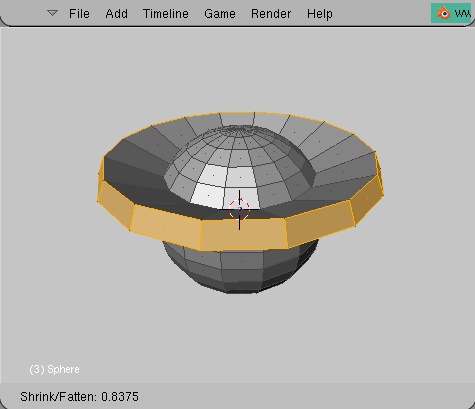
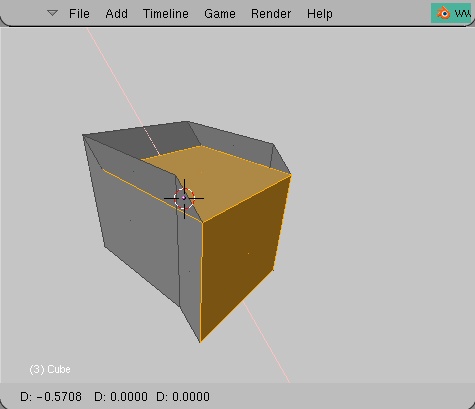
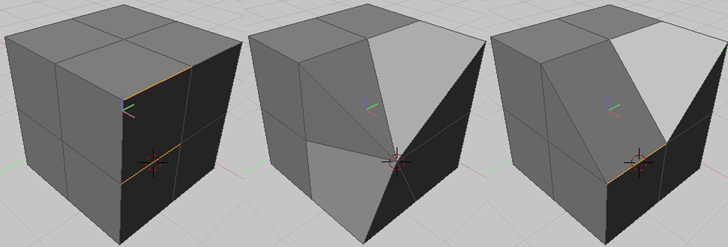
...however - should you want to extrude region the first example below would be the result. The second image shows the expected behavior, which was accomplished using shrink/flatten after the extrude. Worth noting is that, looking at the second image above, individual extrude seems to be using shrink/flatten, whereas region extrude obviously does not.
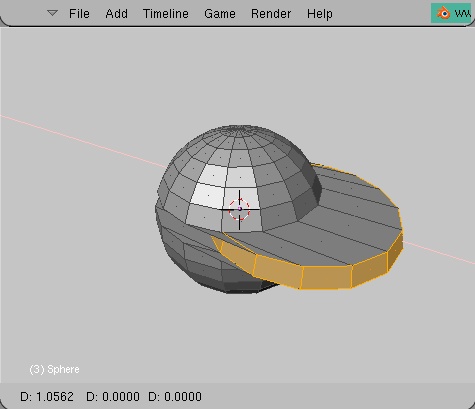

Btw - sometimes the above extrude region example results in this:
-------------------------
Inset scale
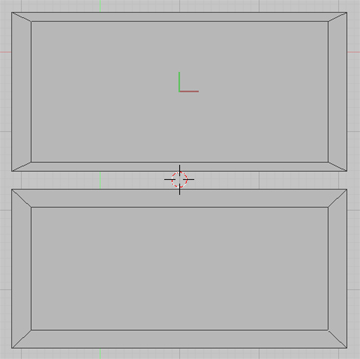
Workarounds:
A. Do a zero extrude,
and scale.
Works perfectly on
individual faces. But when faced with the need to do
50 faces the same way, you're forced to repeat the process 50 times!
B. Select faces,
extrude individual and then use smooth. but there are
drawbacks to this approach.
1.
It's not very
interactive.
2.
You’re stuck
with preset increments, which means that it's not very
exact. What if you want the faces inset exactly 0.35 units?
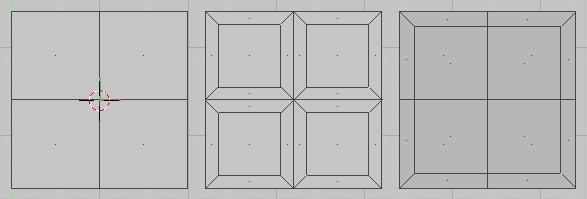
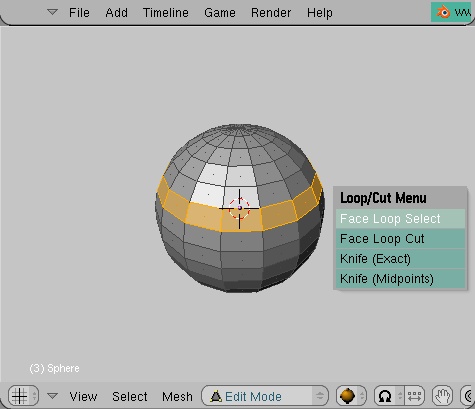
There exists two
different approaches to 'inset' as a tool.
The
first one
works similar to extrude, in that you select the face/faces and apply
the tool
and the new geometry is created instantly and scaled down. The second
alternative is referred to as 'inset scale', and works slightly
differently.
Like the name says, it is more an alternative to regular scaling, and
does not
create any new geometry.
Other than this, they
work exactly the same. I was a bit puzzled about the
“inset scale” approach (inset scale) at first - it forces
me to do in two steps
what I can do in one step with the other method. But there is one
important
advantage. While 'inset' always creates new geometry, there are
instances when
that is not needed. 'Inset scale' allows you to go back to your
selection and
scale later on. That is, faces can still be manipulated after extrude.
That is
certainly worth the extra step. Ideally, an application would have both
implementations side by side, but if I had to chose, ‘Inset
scale´ has my
preference.
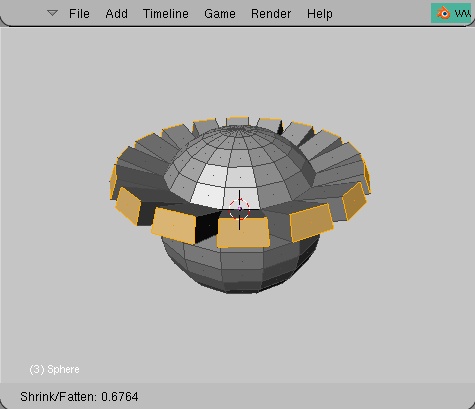
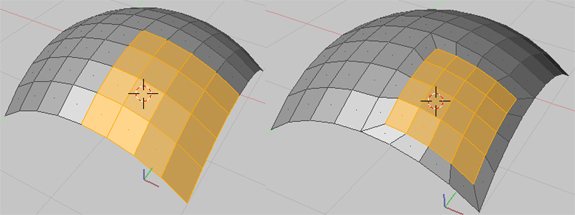
For reference look at Wings 3d. It has an “inset” function, but initially I didn’t think it could do “inset scale”, but apparently “uniform scale” works the same way. For the extra functionality of inset affecting grouped faces, 3ds Max does this. I have approximated in Blender what grouped inset of a rounded surface should look like. This could be a great way to add detail to a rounded surface.
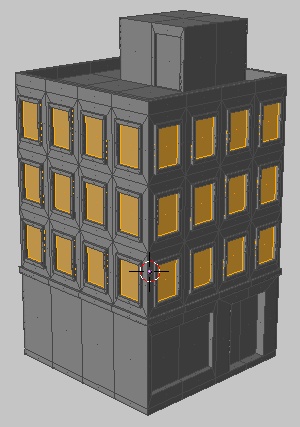
Examples of usage:Can
you say instant windowframes?! Select the facade
of a house which is subdivided into say 50 equal sized polygons. Select
those
polygons, extrude zero individually, then inset scale a bit (affecting
all
polygons). Now, extrude outwards, and repeat the first step again, and
finally
extrude inwards. Even in organic modeling this function is great for
adding detail. Please contribute examples if you
want. These
were the first implementations I could think off.
Cut threshold

--------------------------
And finally, I believe the widget icons could be made more intuitive, so here's a quick mockup that tries to show more what each mode does. Nevermind the colors, my doctor tells me I'm not colorblind, but I might as well be;)
--------------------------
New Subdivide code problems
I know, it is not finished yet, but there is already something worrying me. The new code is bringing more functionality to subdivide, fine, but it is also producing more tris, which is not good. Example:
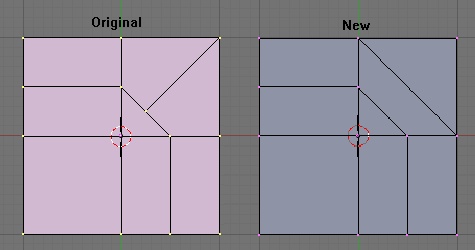
Look at the top-right quarter. The old code produced 3 quads, whereas the new code produces 1 quad and 2 tris. If possible I would prefer a 'keep quads' option for cuts to avoid this. Of course, with n-gons we wouldn't have this problem *hint*hint* ;)